Task
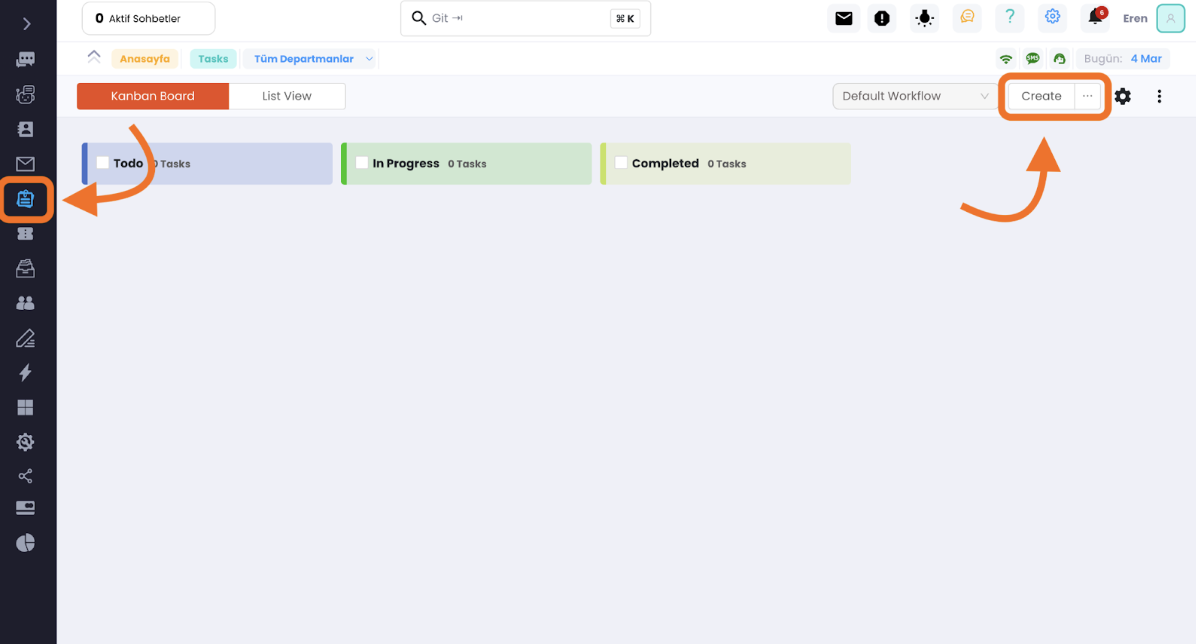
Let's go to the Task page. Click on the Create button marked.
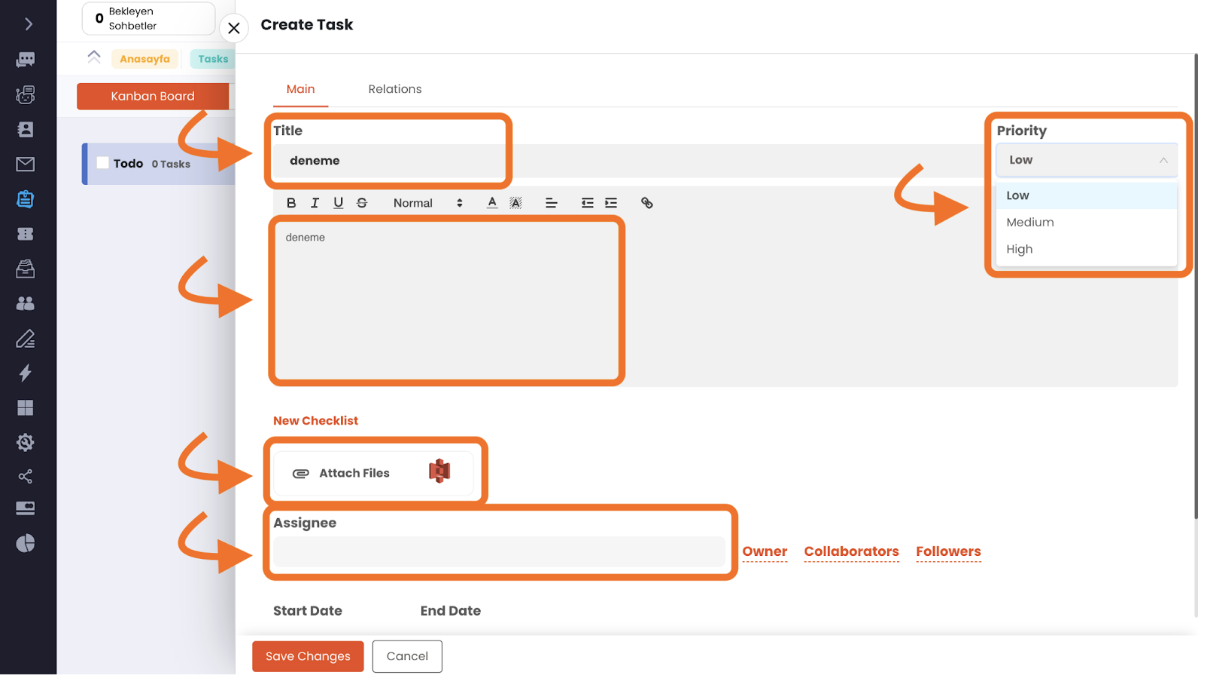
On the opened page, fill in the title section with the name of the task, followed by the task description below it. Then, specify the priority of the task from the priority section on the right. You can attach any desired file using the Attach Files section. The Assignee section is used to assign this task to the desired user.
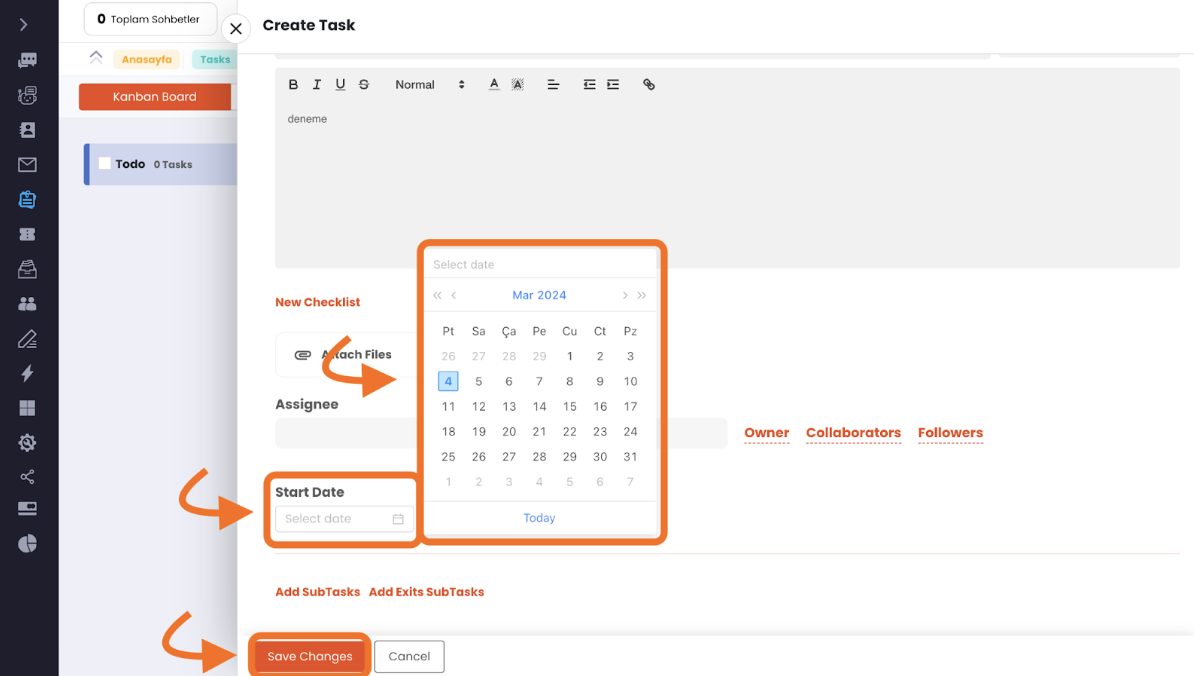
You can set the start and finish dates with Start date and finish date, respectively. After completing these steps, simply click the Save Changes button. Your created task will be saved.
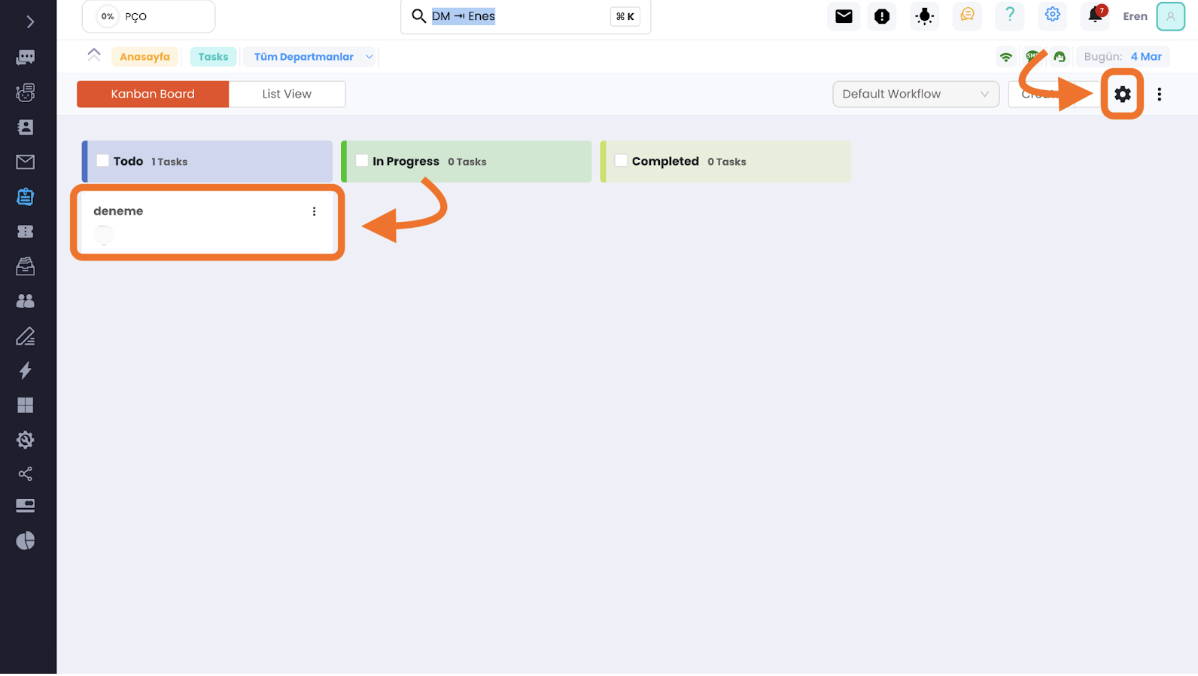
Your created task will appear like this, and you can modify it anytime or move it to another list. The settings button at the top right is used to create a new Board. If you want to record your tasks with multiple boards, you can create a new Board using this button.
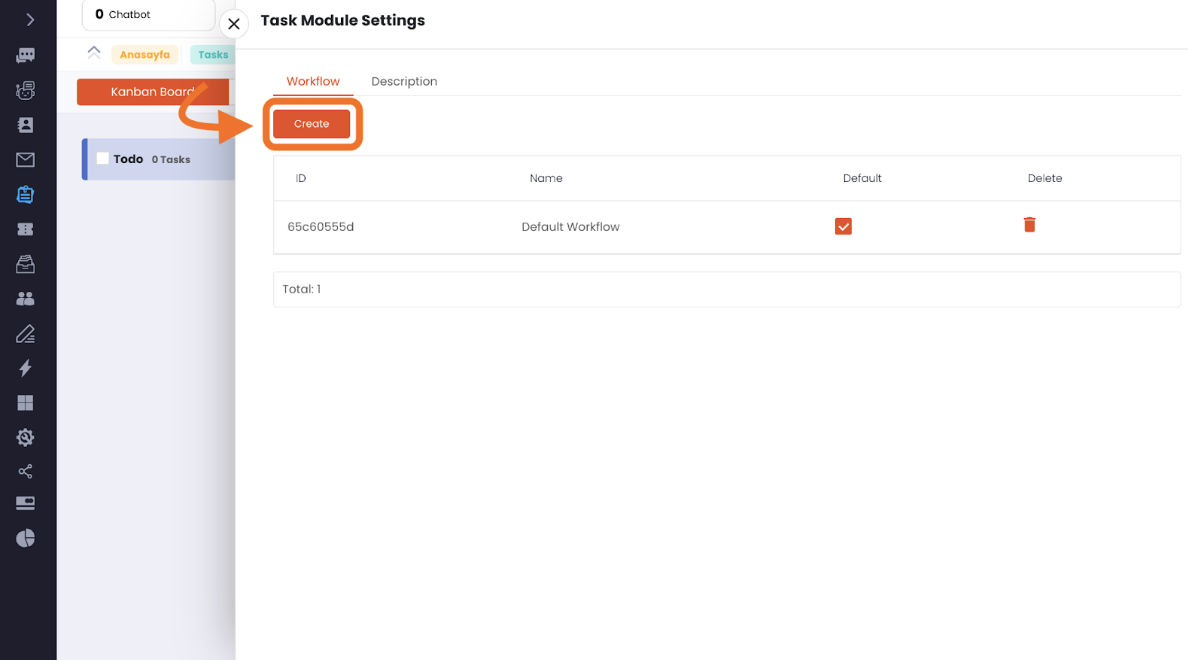
Click on the Create button.

Here, you can add the name and description of the new workspace you are about to create.
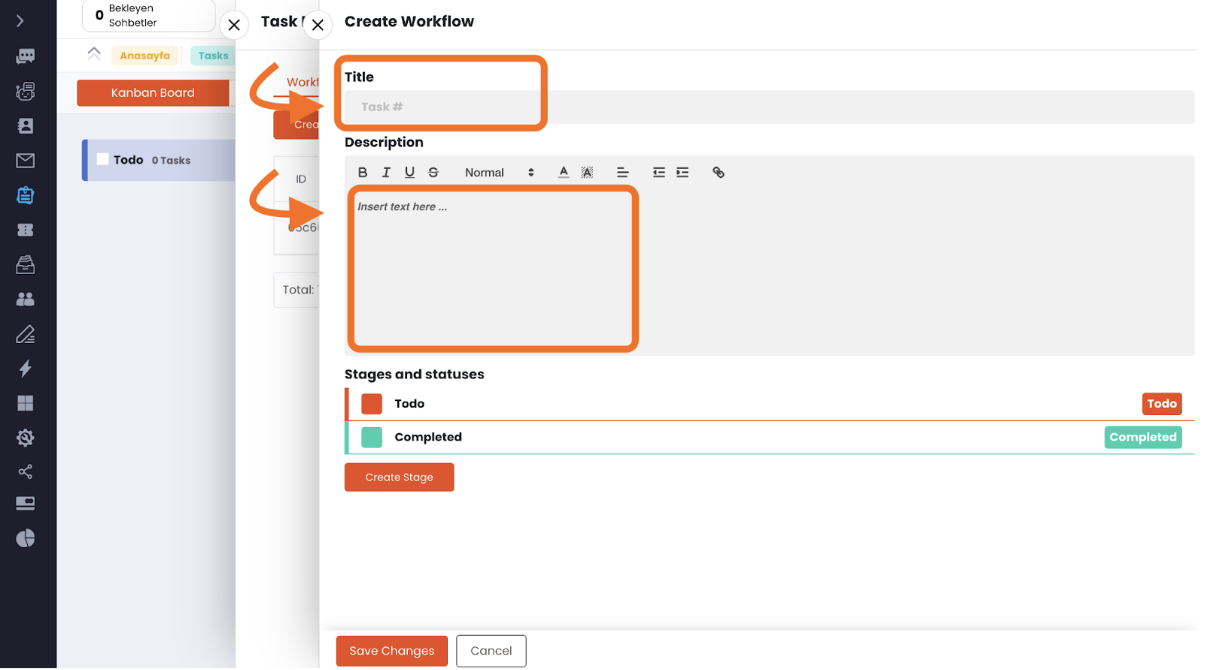
Click on the Create Stage button to create a new stage. You can rename the stages you've created and choose any color by clicking on the colored box on the left side. After this step, simply click Save Changes.
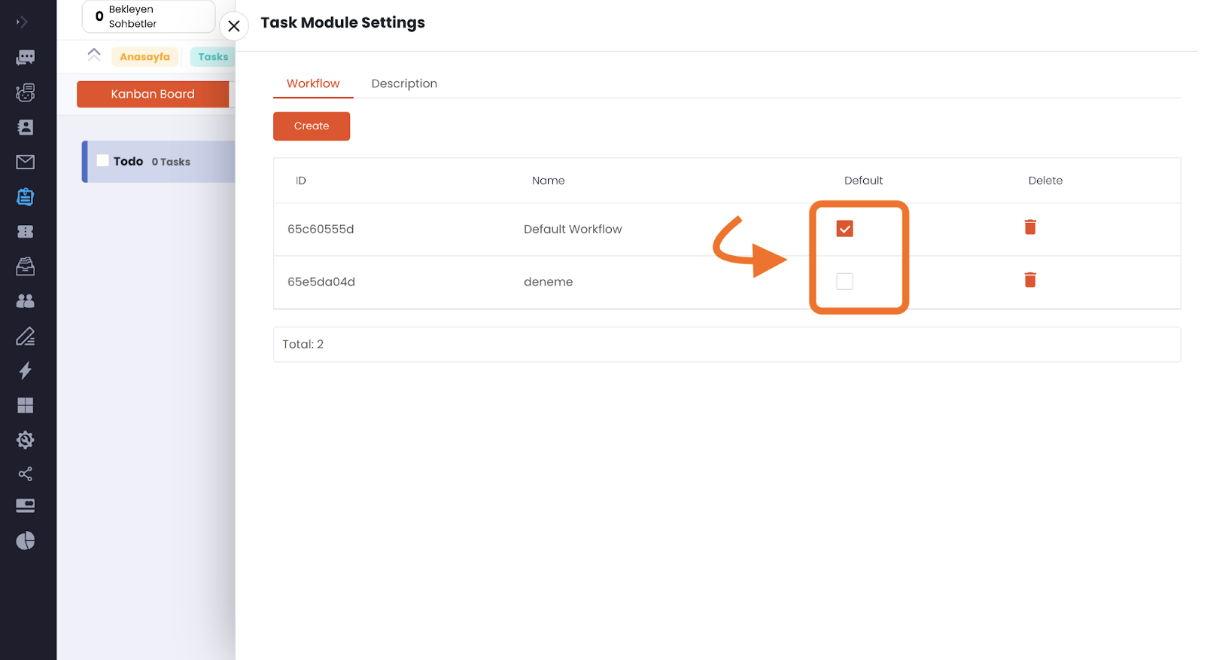
When the Tasks screen opens, you can choose the workspace you want to be opened by default.
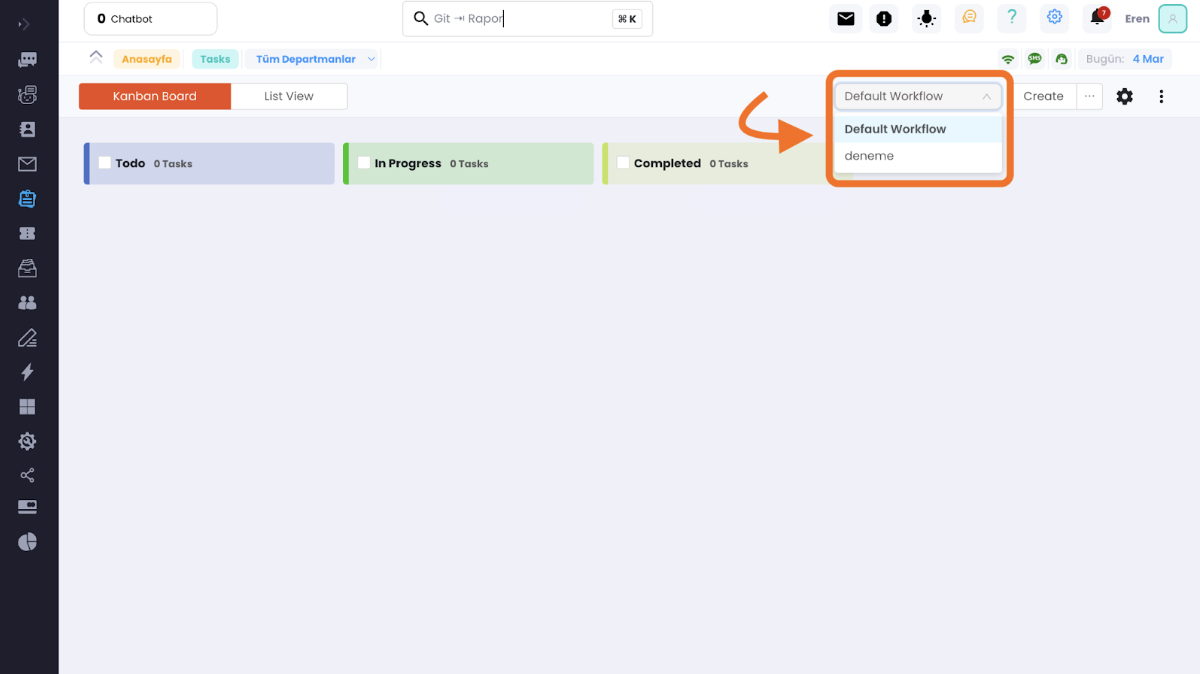
Similarly, you can switch between workspaces from this section.
As seen, Supsis has such a simple interface to use. If you encounter any issues, our support team can always be contacted. We are happy to solve your problems because our users are very important to us. You can reach our Supsis website here and request support.