Panel settings
Panel Settings and Integration Processes
Let's proceed by clicking on "Verify" in the invitation email sent to your specified email address via our website. Then your panel creation process will begin. We'll wait for about 1-2 minutes for our panel to be created.
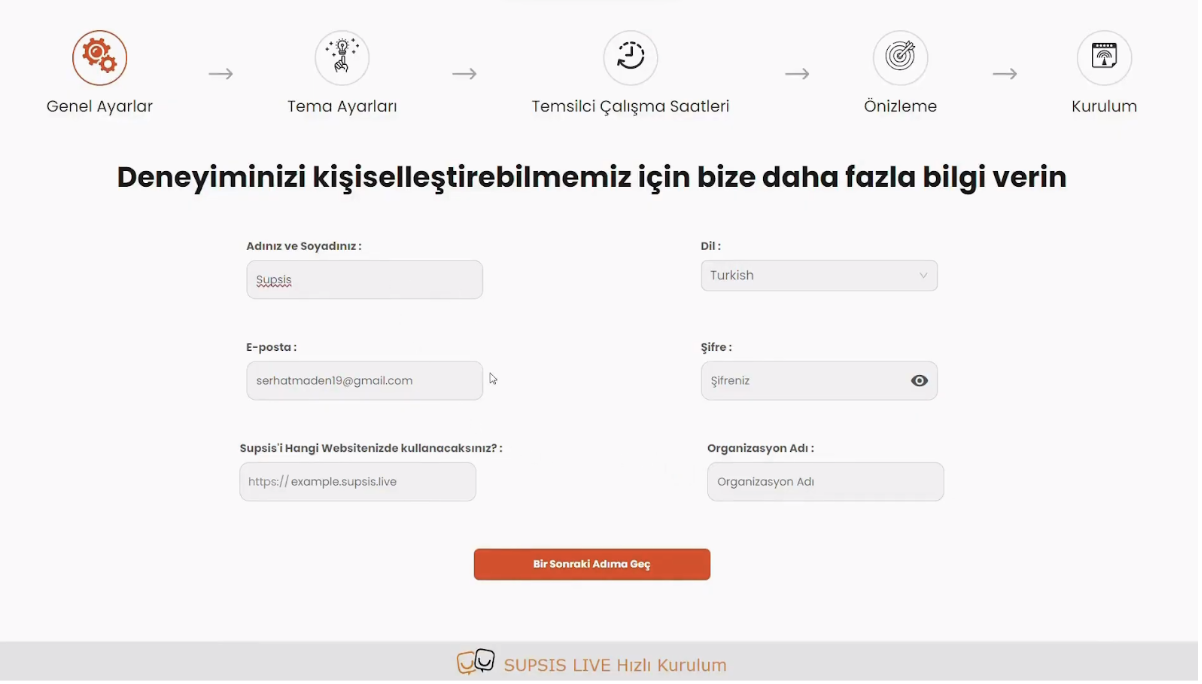
At this stage, we fill in the required information appropriately and continue.
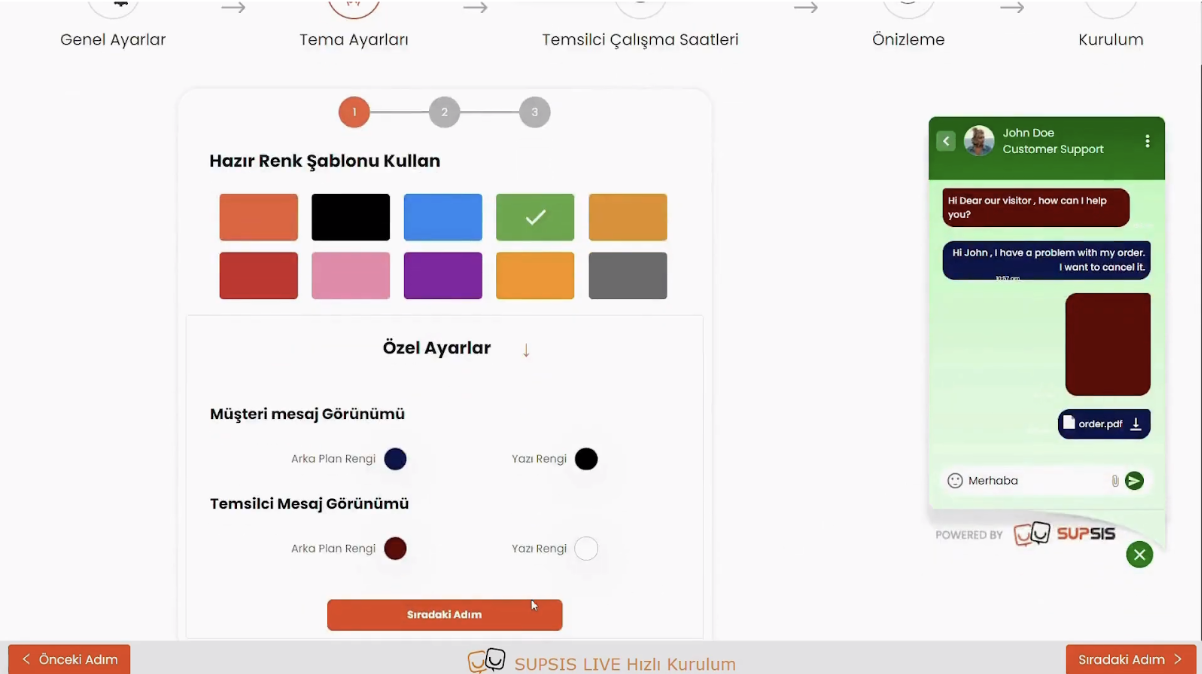
The next screen is called "Theme Settings." Here, we make our preferences for the speech bubble and chat frame that we want to integrate into our site. We can change these settings later on the panel.
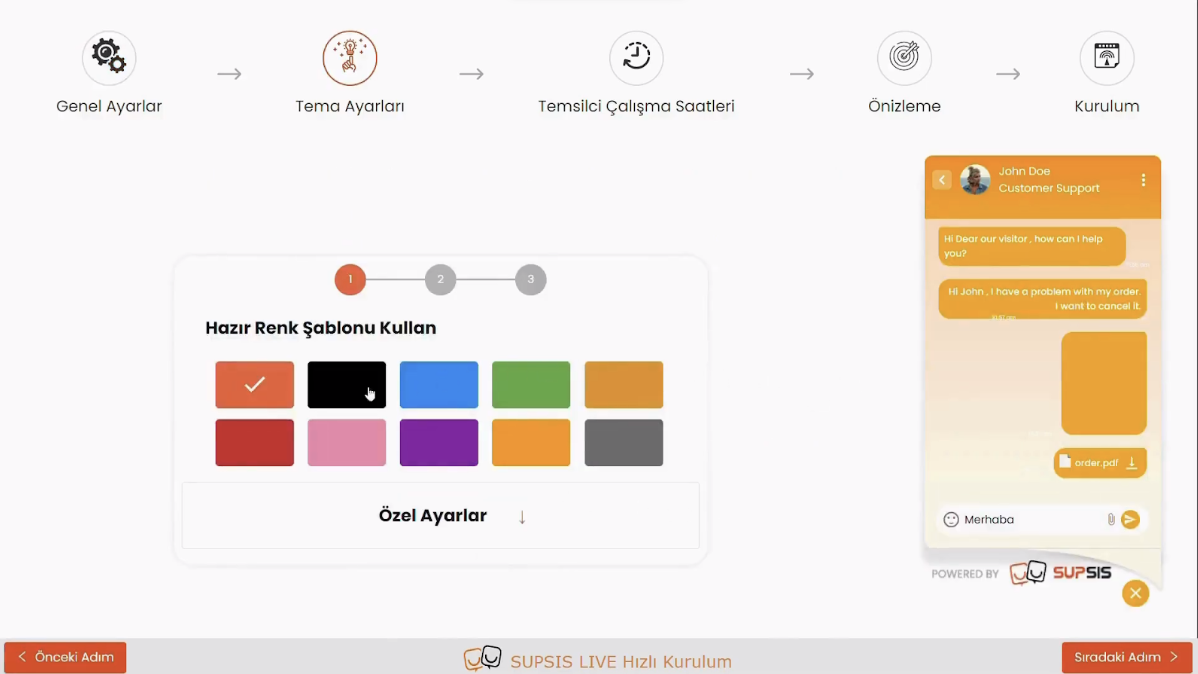
We can change the color, shape, and theme of the Chat Bubble that our visitors will see, as well as our chat frame, to reflect our brand in the best possible colors. Additionally, if we want a more special color, we can click on the " Custom Selection" area below and choose from the color palette, allowing us to have a more personalized bubble. After finishing these customizations, we can click the "Next Step" button at the bottom right again.
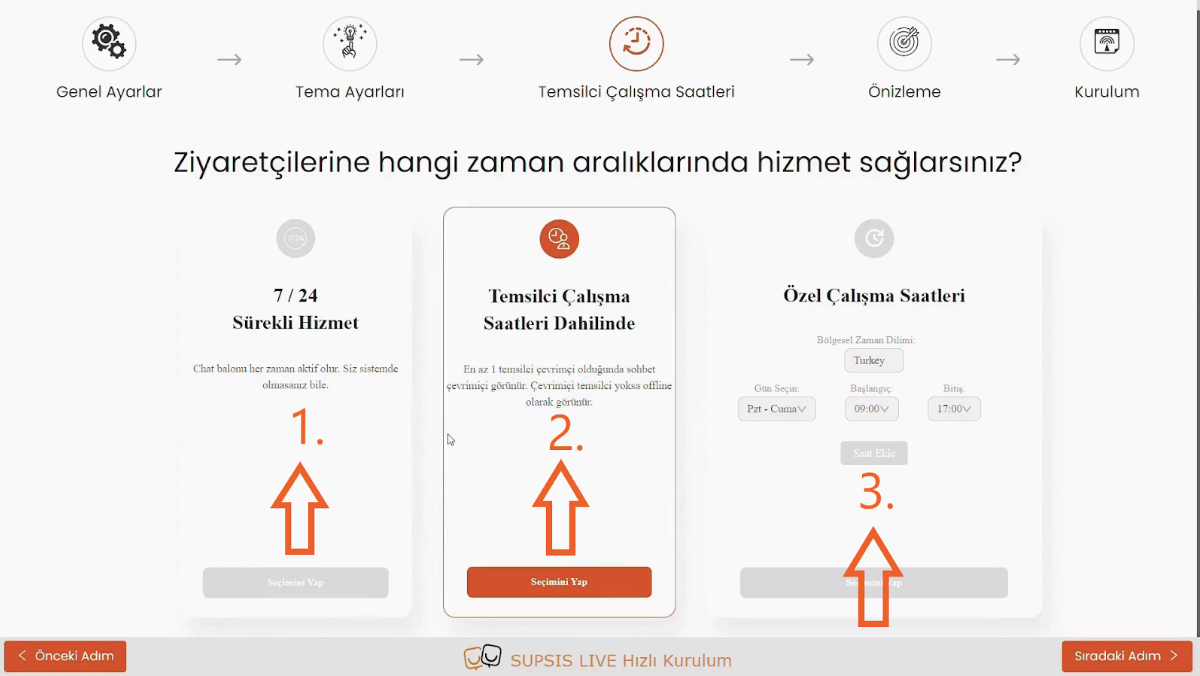
Next, we need to decide when the chat will be online. The purpose here is; if visitors come outside of certain hours, they should know that we cannot respond at that moment and should not feel insecure about us not responding. For this, we need to select the hours we will work from here. Outside of working hours, if a visitor clicks on our chat bubble, they will see a message like "None of our representatives are currently active. Would you like us to contact you via email?", and they will be asked to leave their email address. This way, a visitor who enters our site to get information will not leave without communicating.
-
1- This option ensures that the chat is always online and the Offline Message never appears.
-
2- This option is similar to the first option, but there is no specific hour. However, at least one of your representatives must be "Online" to appear online. If all your representatives are "Offline," then the Offline Message will be active.
-
3- In our last option, we can select specific days and hours. In this way, the Offline Message will be active outside of the hours we have determined. After selecting one of these, we need to click the "Next Step" button at the bottom right again.
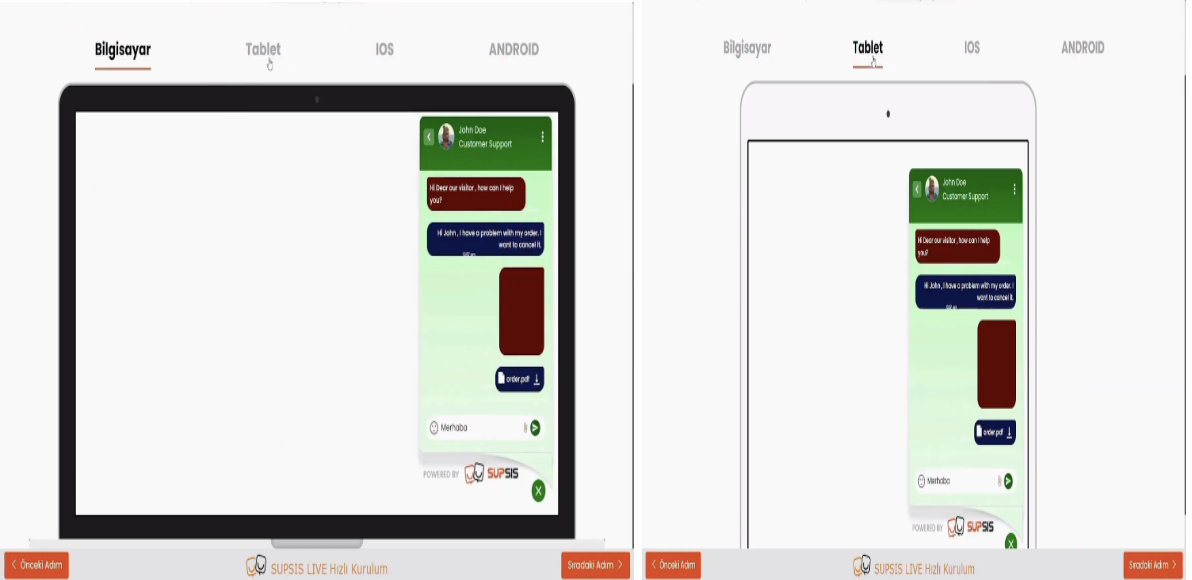
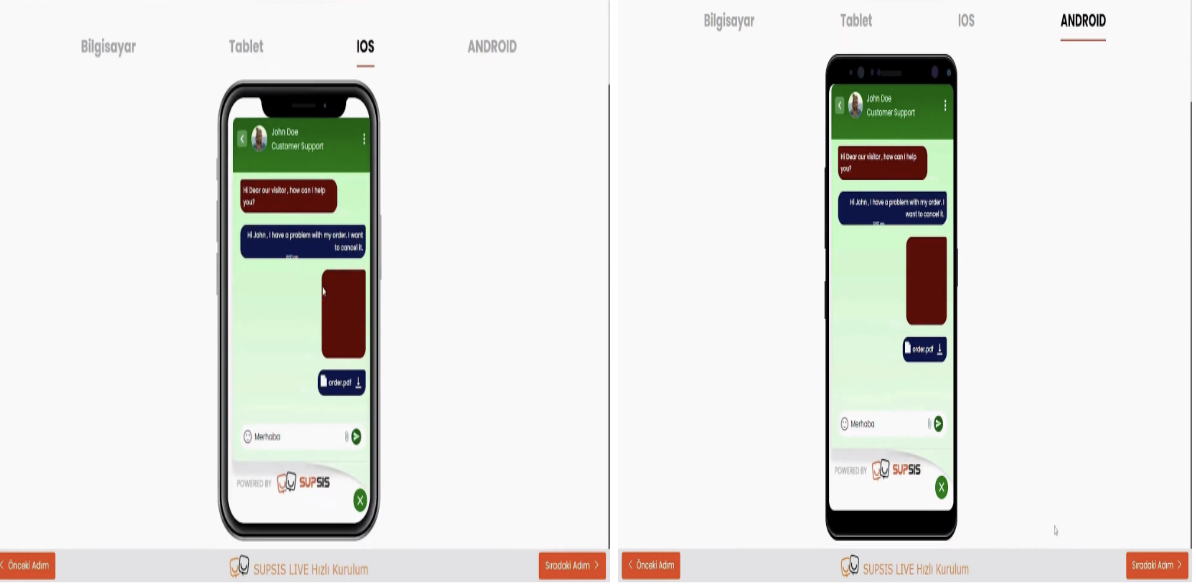
This screen does not make settings but rather shows us an image of the chat we created throughout these steps and allows us to preview what our visitors will see in advance. We can see how our chat will look not only on a computer screen but also on a tablet and IOS or Android phone. If everything is okay in this section, we proceed again by using the button at the bottom right.
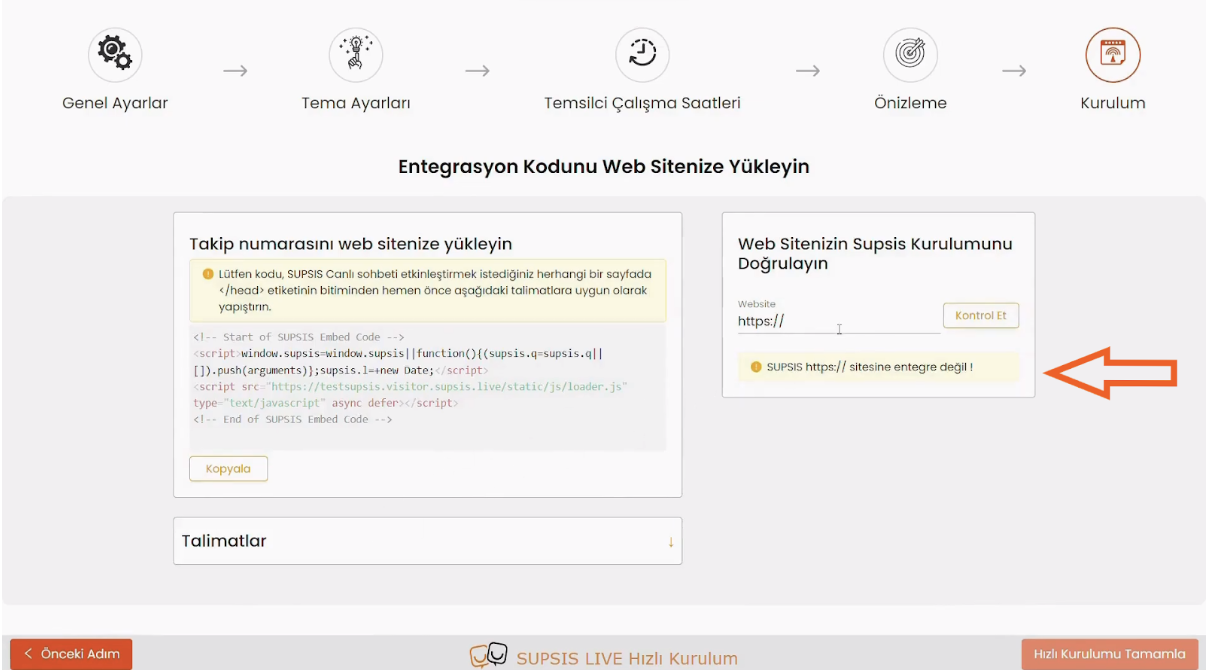
On the last screen, we find information and instructions on how we can integrate our personalized Supsis system into our site. If you contact Supsis regarding this, they will be happy to help you. However, if you want to do it yourself, you can follow the instructions to complete this process. After integrating the system into our site, we can write the address of our site in the area marked with an arrow and find out whether the integration process has been done correctly or not. If the integration process is not done correctly, we will encounter the message "Supsis not integrated!" under the arrow.
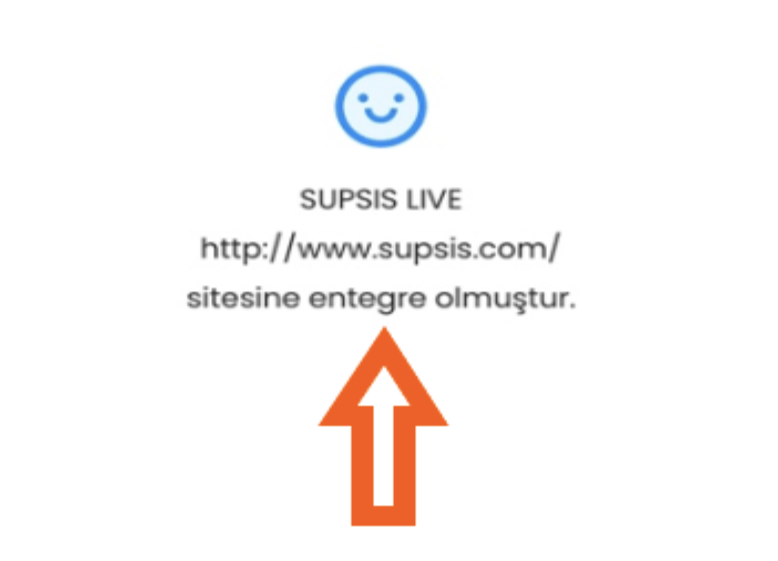
However, if the integration process is successful, we will see the message marked with an arrow in the same area. After that, when we click the "Complete Quick Installation" button at the bottom right, we finish the installation process.
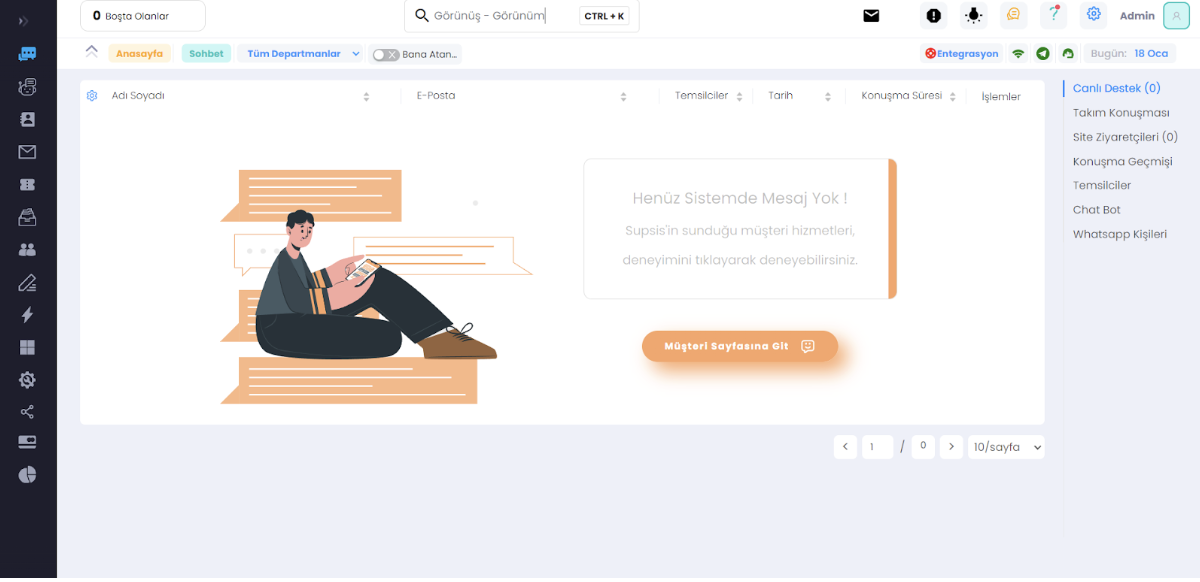
All settings are completed, and this is our admin panel. The system is now up and running, and we can view all activities from here.