How to Create a Chatbot?
If you want to watch a video on how to create a chatbot, you can watch it here. You can also follow the steps below to learn about this topic.
To create your bot, you need to have an active ChatBot account. Visit the demo creation page to create your account and sign up as a new demo user. ChatBot offers a free trial of 50 chats per month, so you can use your bot within this usage limit. Let's get started on the journey!
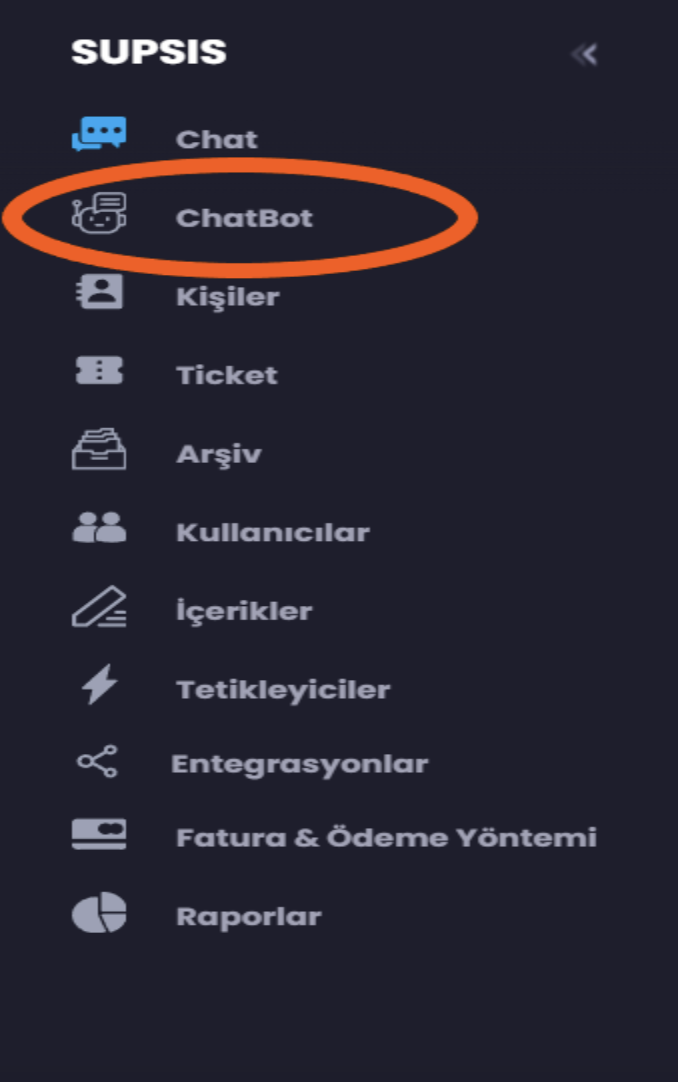
After creating your account, you will go to the ChatBot tab where you can create a new story. Click on the Create Bot button.
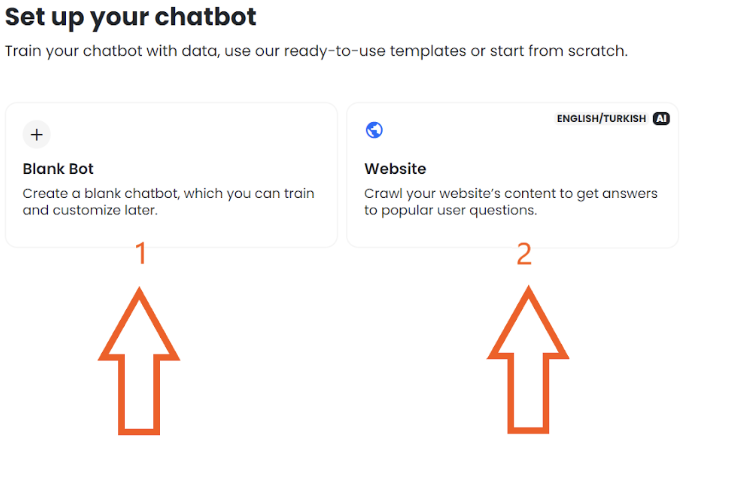
You can create a chatbot suitable for you by scanning your website with our artificial intelligence feature (2). You can also manually create a chatbot by clicking on Blank Bot (1), let's create together!
1-) Manual Chatbot Creation
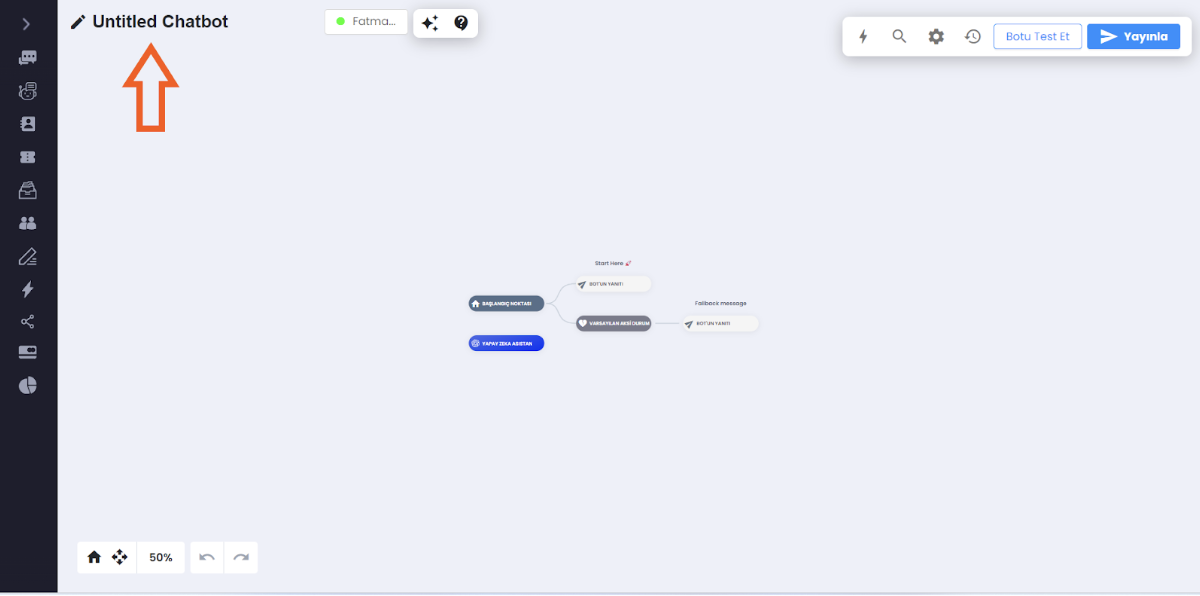
You can change the story name of your new story as you like.
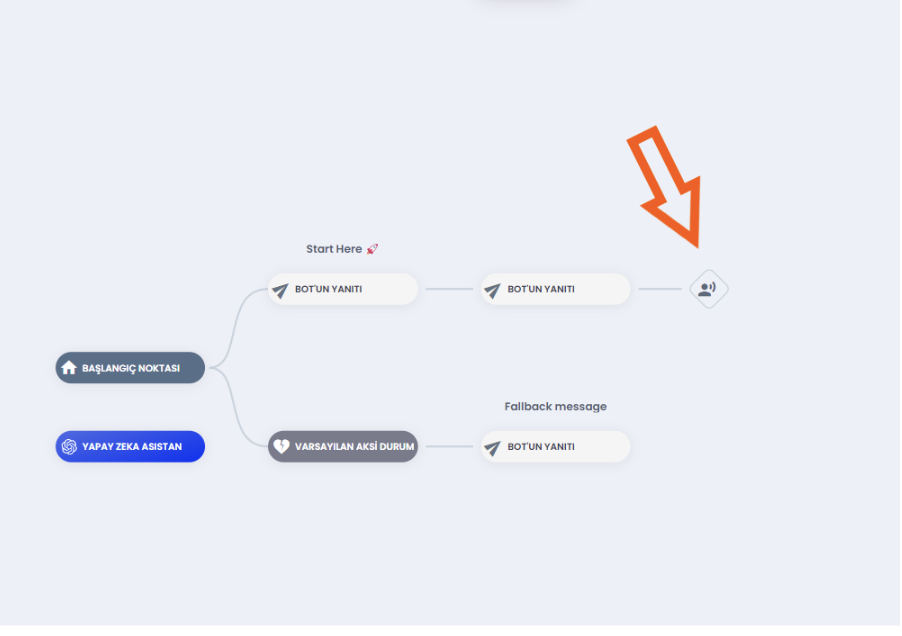
After creating your first story, you will find yourself on this page, and then the scenario area will contain the scenario name you provided or the scenario you provided when creating the Bot. You will be transferred to the ChatBot Editing section by clicking on it. By default, we have prepared a basic conversation tree there to help you get started. You can check the example by entering the chatbot page of your panel and clicking on the chatbot above.
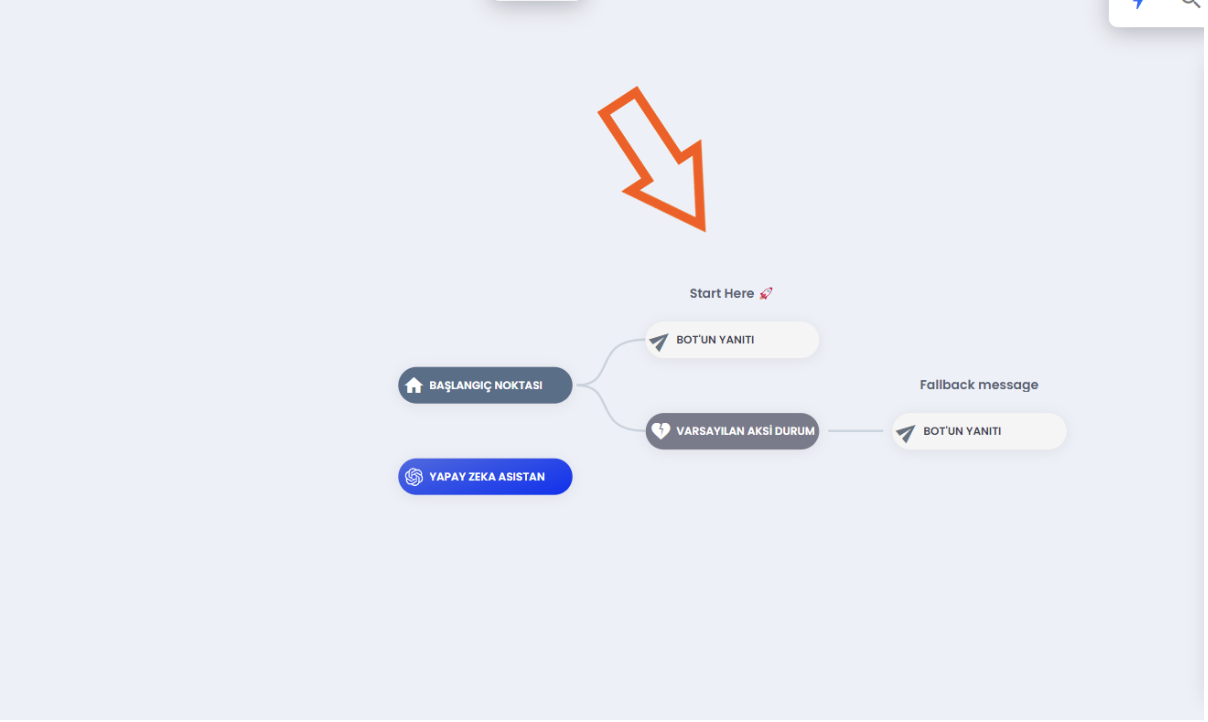
The starting point indicates where your story begins. This is an uneditable point. We have also added a default Welcome/Hello message to greet users. You can edit it as you like. Let's use this opportunity to grab a user's attention! Click on the Bot's response block to open the editing window. We have prepared 6 types of welcome messages. With our "Artificial Intelligence Assistant" system powered by ChatGPT, you can make your customers feel special, which is a first in Turkey.
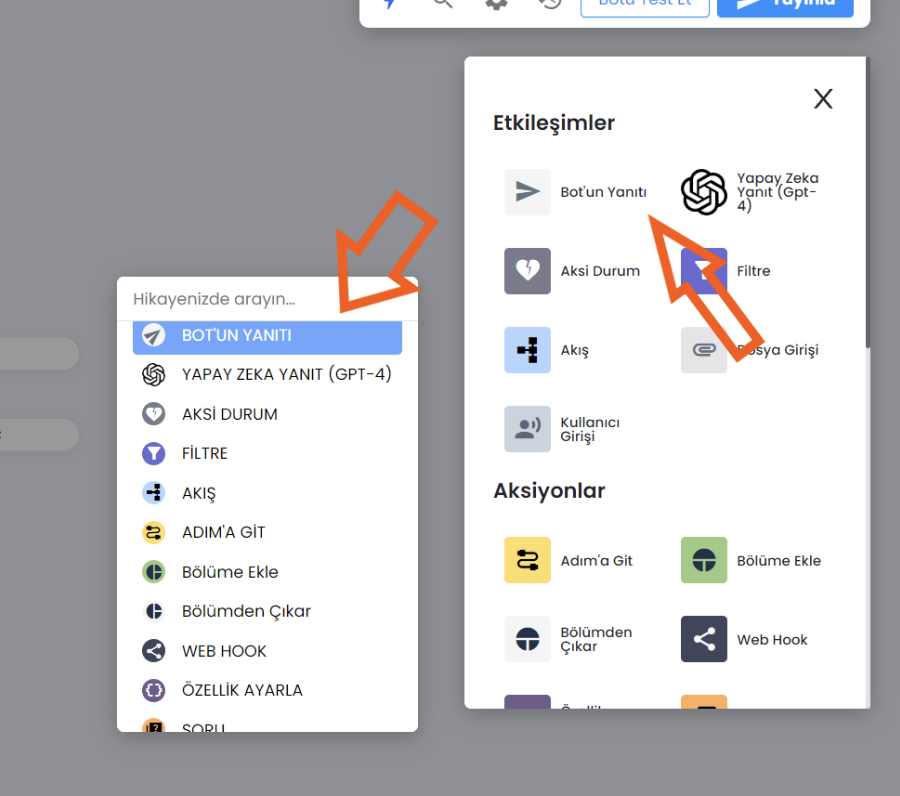
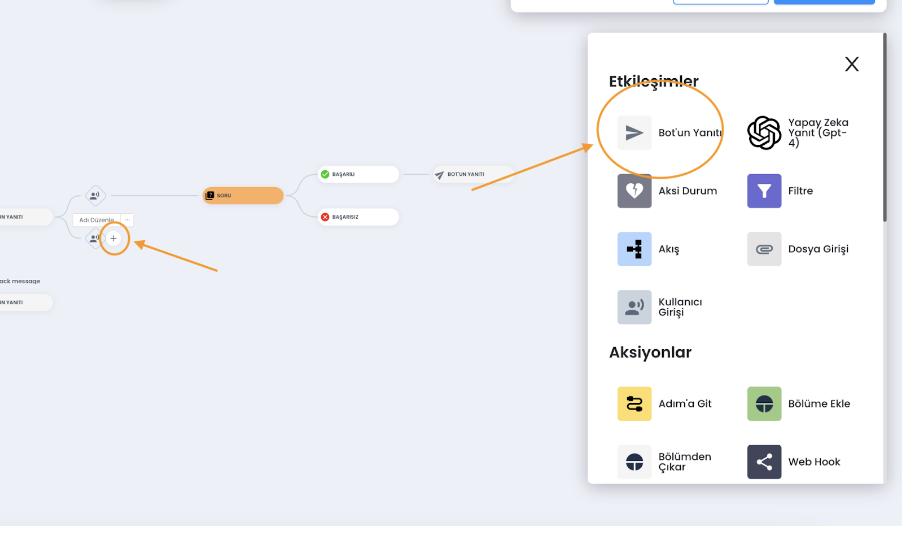
What is the Response Block of the Bot for?
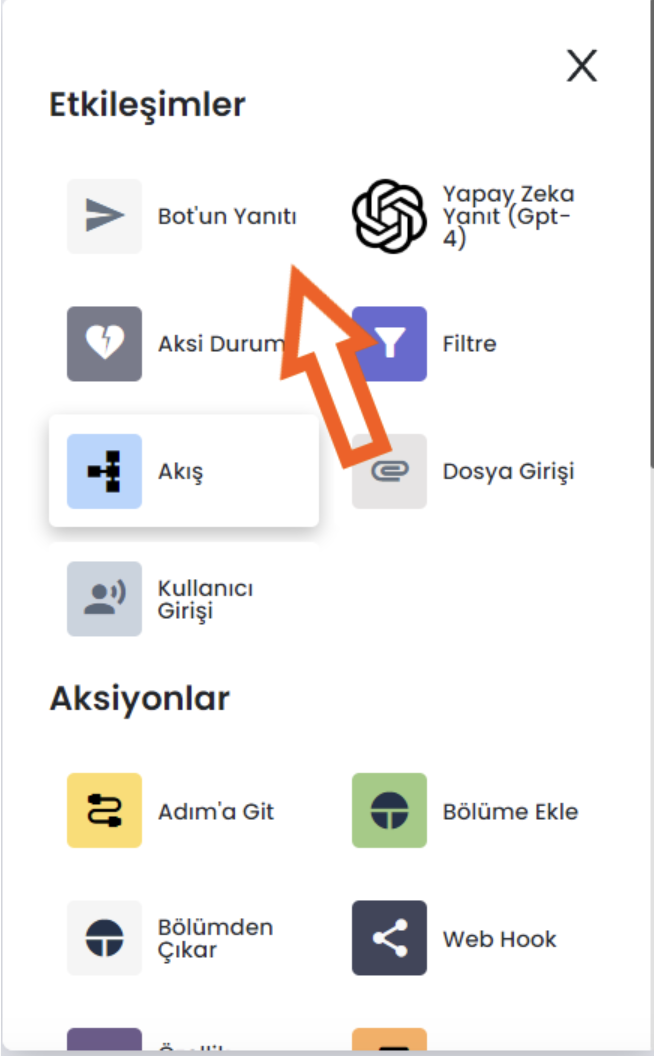
The bot response block contains a message that your chatbot sends to a user. Here, you can ask a question to the user or allow them to choose from predefined answers. There are 6 features available. You can determine how to use these features according to your needs. Features:
-
Text --- Used to send a normal message response.
-
Random Text --- With this feature, you can add as many messages with different types but the same message content as 1 2 3 as you want, and the feature sends a randomly selected message among them to the user.
- Image --- Sends an image to the user.
- Gallery --- Sends a catalog with images and message content side by side to the user.
- Button --- A button with message content that the user can click.
- Quick Reply --- A button that the user can click. The difference from the normal Button feature is that it is smaller in message content.
Let's create an example together :) Make sure you've reached this step, and after this process, we'll make our own
adjustments.
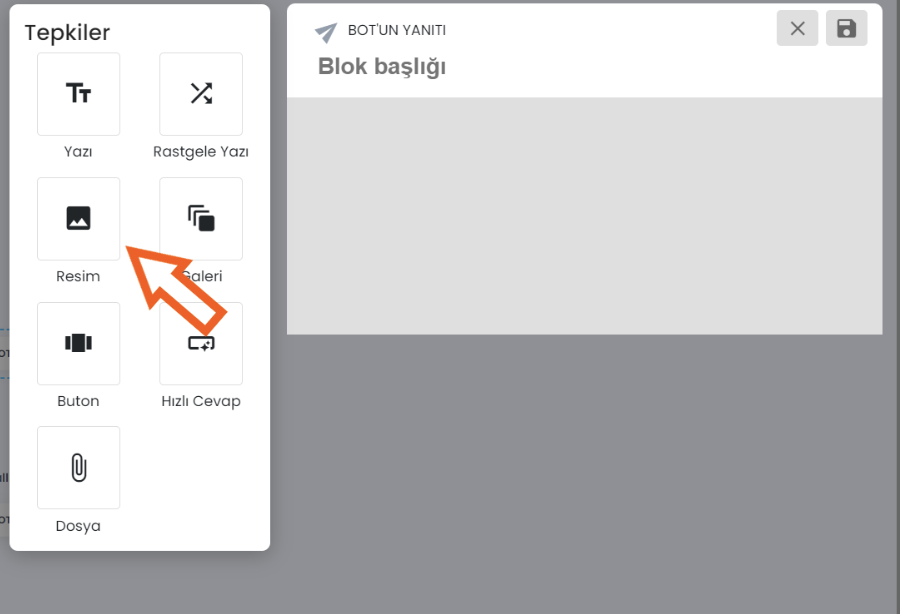
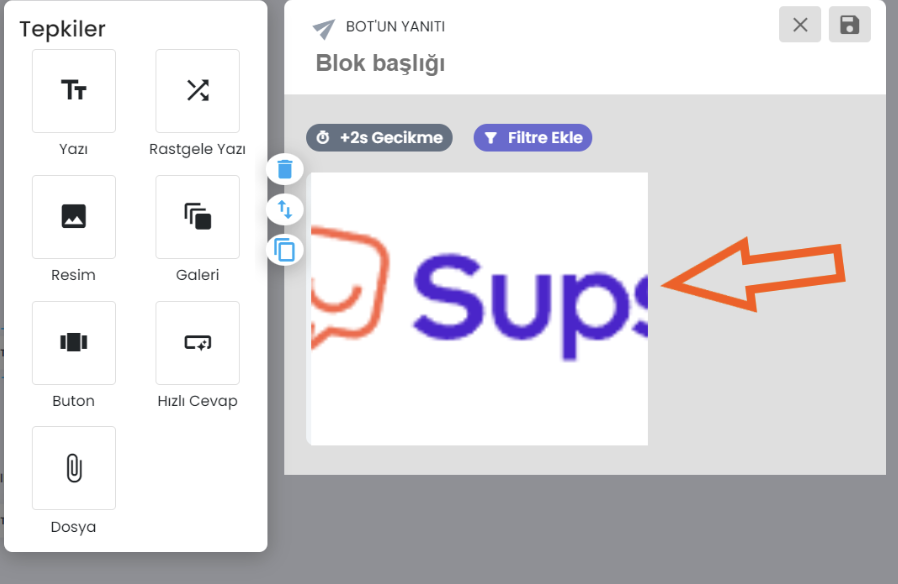
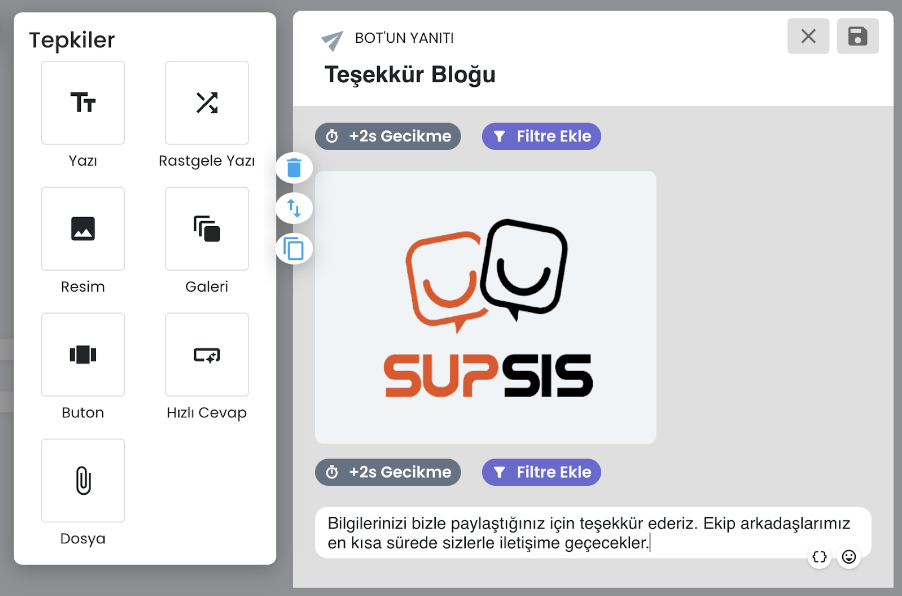
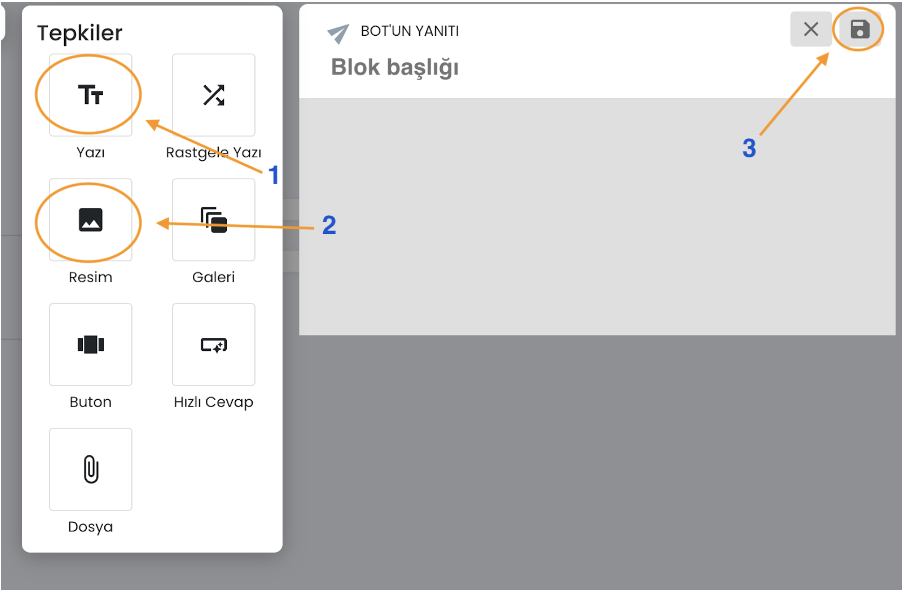
Select a Image response from the menu on the left and click. Then, upload the image you want to show to users.
Next, click on another Text response from the menu. This will send another message text to the user 2 seconds after the image. This will be delivered to the user as another message text sent from you. If you want the message to be sent to the user earlier or later, you can extend or shorten the time of the message to be sent by clicking on the block labeled "Delay +2s".
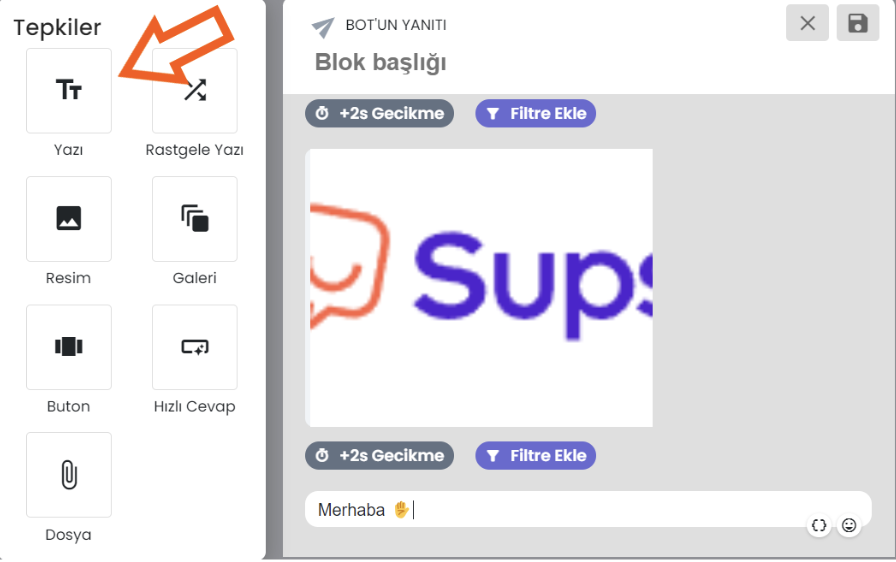
Then, click on "Text" to add another quick response. This will send another message text to the user 2 seconds after the image. This will be delivered to the user as another message text sent from you. If you want the message to be sent to the user earlier or later, you can extend or shorten the time of the message to be sent by clicking on the block labeled "Delay +2s".
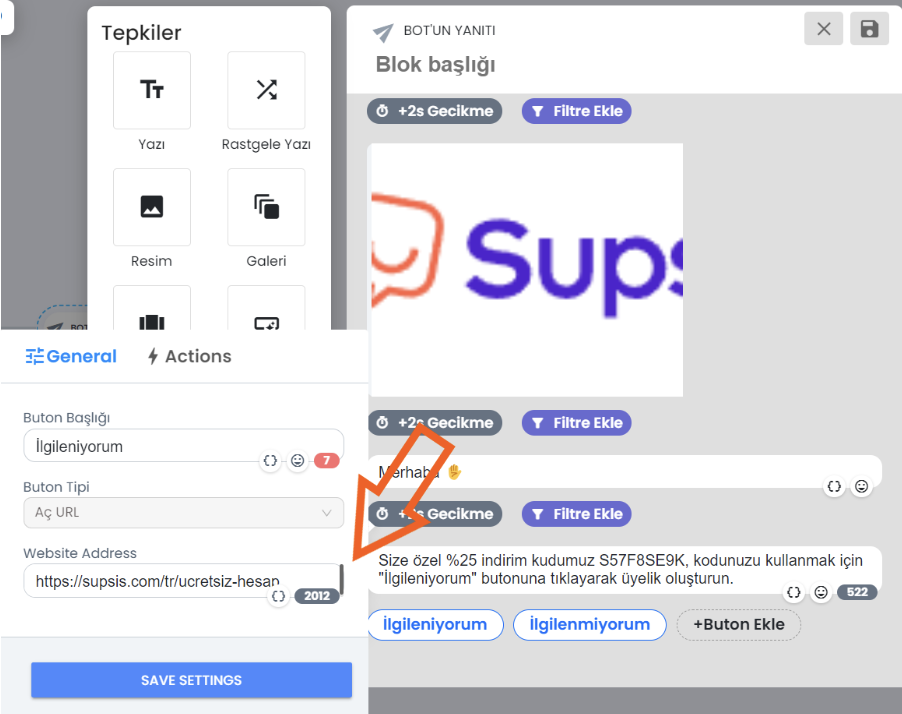
Next, let's add a quick reply. Here, you can ask the user if they want to sign up for your site. For example, you can encourage the user to do this by offering a coupon code. By selecting the appropriate button type, we proceed. This process will present the user with a screen where they can choose from the buttons you add. When you're ready, click on the save button on the top right of the step you created to save all your settings and edits.
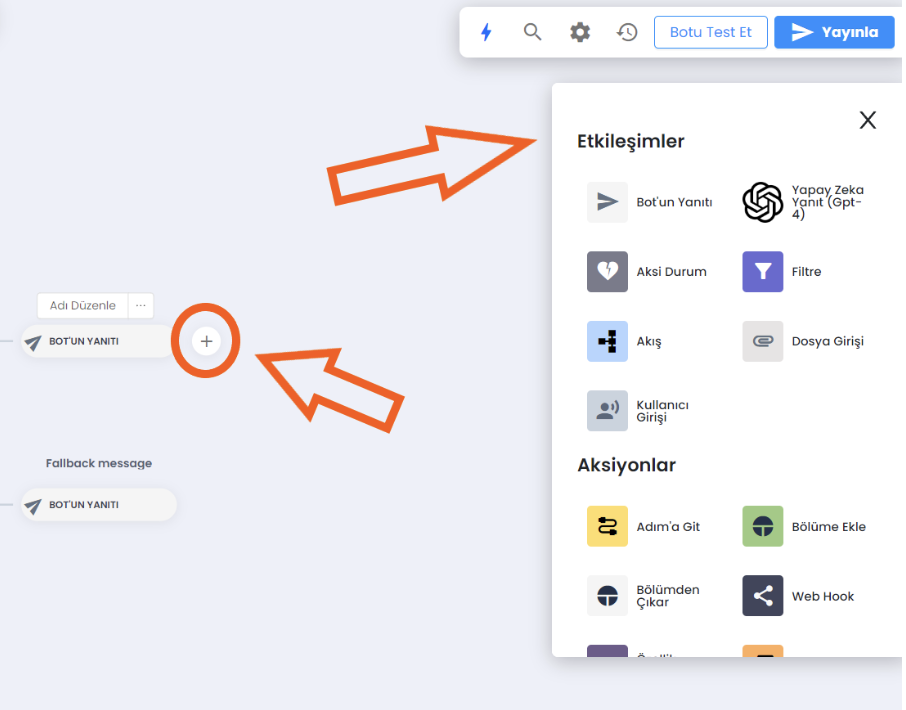
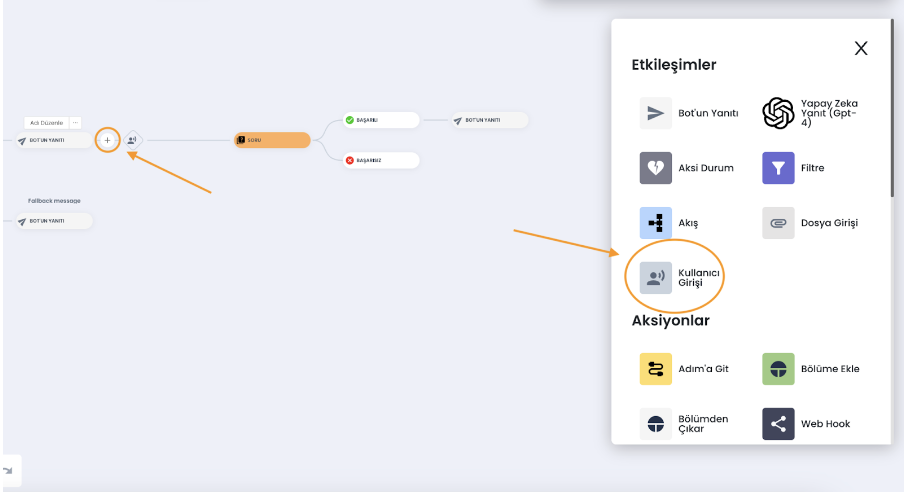
Now it's time for user input. Select the User Input block from the interactions menu and place it after the Bot Response block. You can drag and drop or add the desired feature by clicking on the (+) icon on the right of the block.
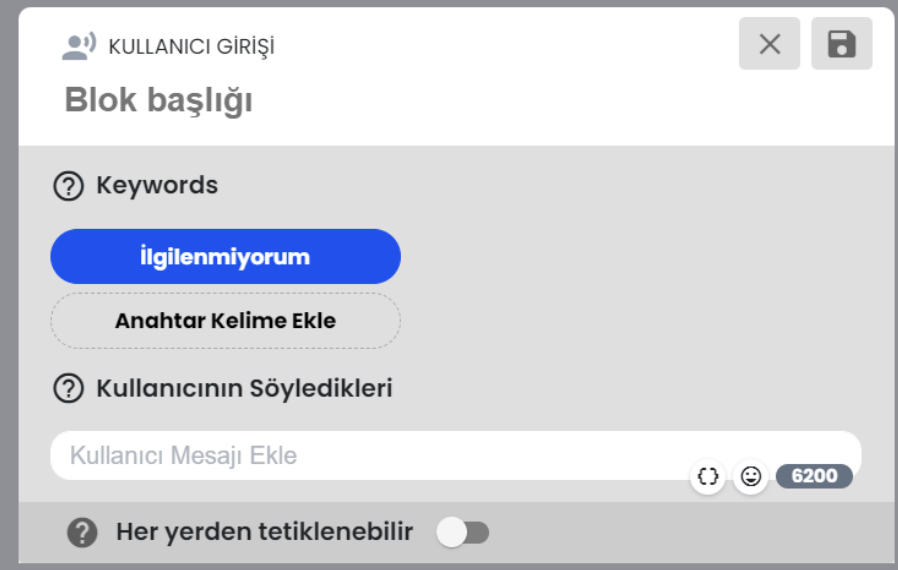
The User Input block allows you to collect user responses. In this block, you need to define what type of user messages will trigger the bot's response. To create user input, you need to define Keywords and What the User Said. These are matching systems from which you can choose. The user input will wait for an action from the user after the messages sent by the bot to the user. This action can be waiting for the user to click a button or waiting for a message from the user. The bot will not move on to another process until an action is received from the user, and will move on to another process based on the action received from the user. After that, the next action can be as different messages or much more different processes based on the action or response from the user. What matters now is that an action is expected from the user and until this action or response is fulfilled, our bot will not move on to another process.
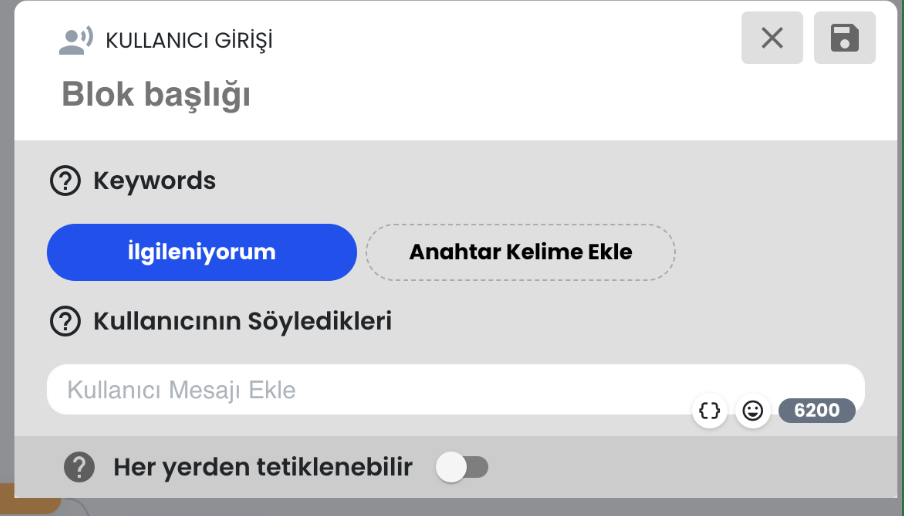
If you want your bot to respond to a specific keyword, use the Keyword Matching system. If you expect users to respond
using longer expressions, use the What the User Said field. When your response is ready, click on the save button.
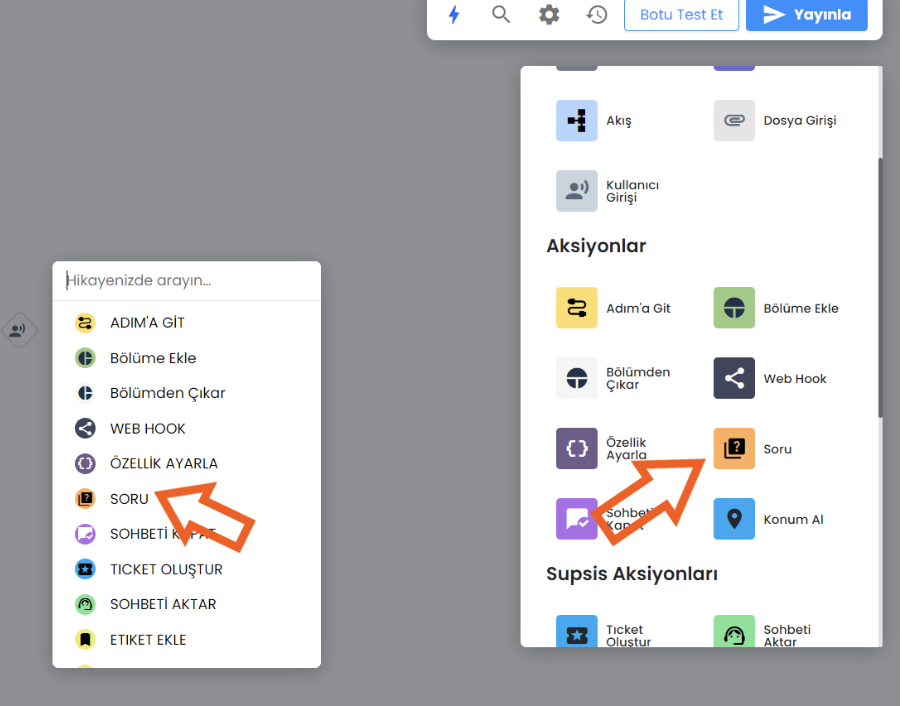
Now, let's collect the user's email address. Drag and drop the Question block from the main menu and place it after the
User Input block.
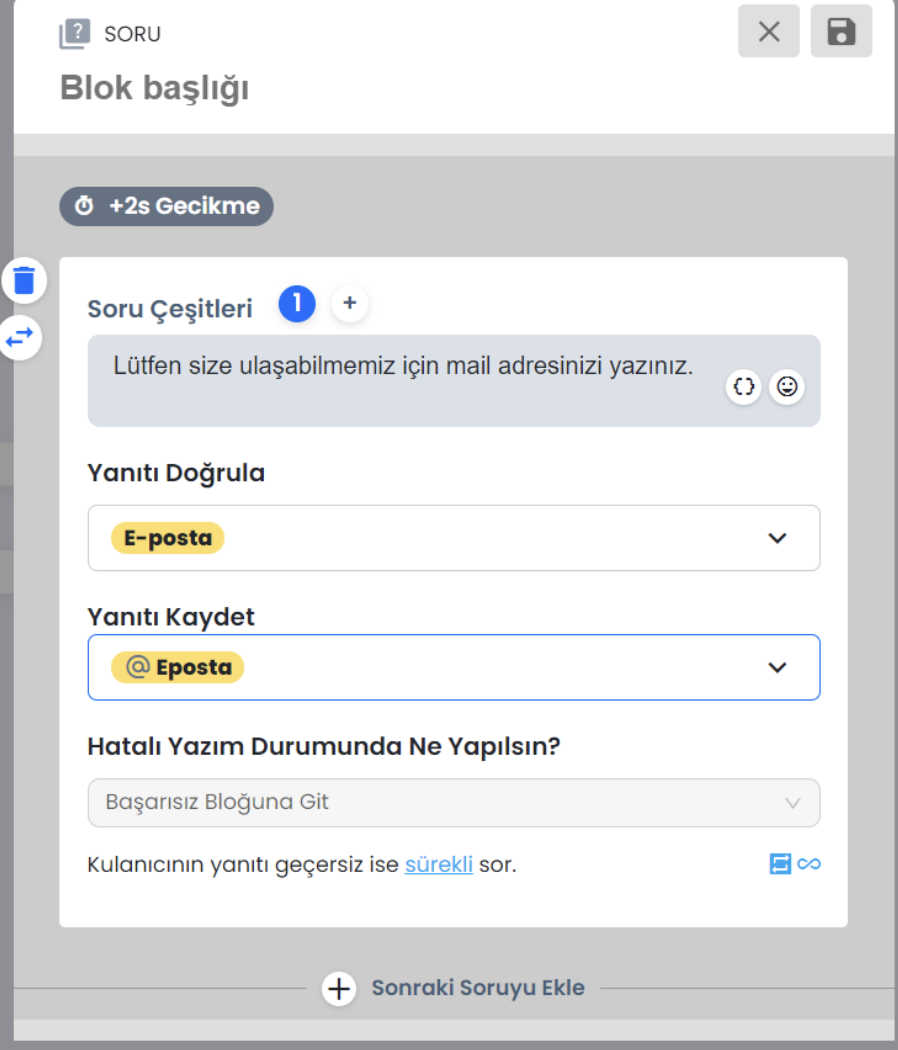
Click on the Question block and write the message you want to send to the customer. By clicking on the + button next to the Question types section, you can add more variants here. This way, when the user provides the wrong email format, the bot uses different words to ask for the appropriate email format again. By doing this, you can make your chatbot more natural. Select Email from the Verify response field. In this way, your chatbot will know whether the user has provided the correct format for their email address. In the Save response field, set the default Email attribute. This way, if the user provides the correct email address, ChatBot will assign this email address to the user. Then, in the Failure action block, you can choose what your bot will do if a user cannot write the correct email format. If you select Go to failure block, the bot will not save the wrong email address format and will ask the user to provide the correct email format again. Then, select Retry After Filled, so that your bot will continue trying until it receives the correct response. When you're ready, click on save and close.
 Now, let's thank the user for the email address. To do this, select Bot Response from the main menu and drag it, then drop it after the Success block.

Write the name of the block (1)
Add an Image response and upload an image you want to use (2)
Finally, add some text responses and enter your messages (3)
When you're ready, click on save and close (4)
 Now, you need to prepare the bot's message if the user does not want to sign up for your site. To do this, drag and drop
the User Input from the main menu and place it after the Welcome message.
Now, you need to prepare the bot's message if the user does not want to sign up for your site. To do this, drag and drop
the User Input from the main menu and place it after the Welcome message.
Fill in the User Input block appropriately. Click on the User Input block and, if you wish, write the name of the block. Then, enter user responses using Keywords or What the User Said fields. Write down all possible responses that your users can send. When you're ready, click on save.
 Drag and drop the Bot Response block from the main menu and place it after the User Input block where the user refuses to sign up for your newsletter.
 Click on the Bot Response block. Fill in the Text section (1) appropriately, select Image response (2), and enter your bot's message. Then, click on save (3).
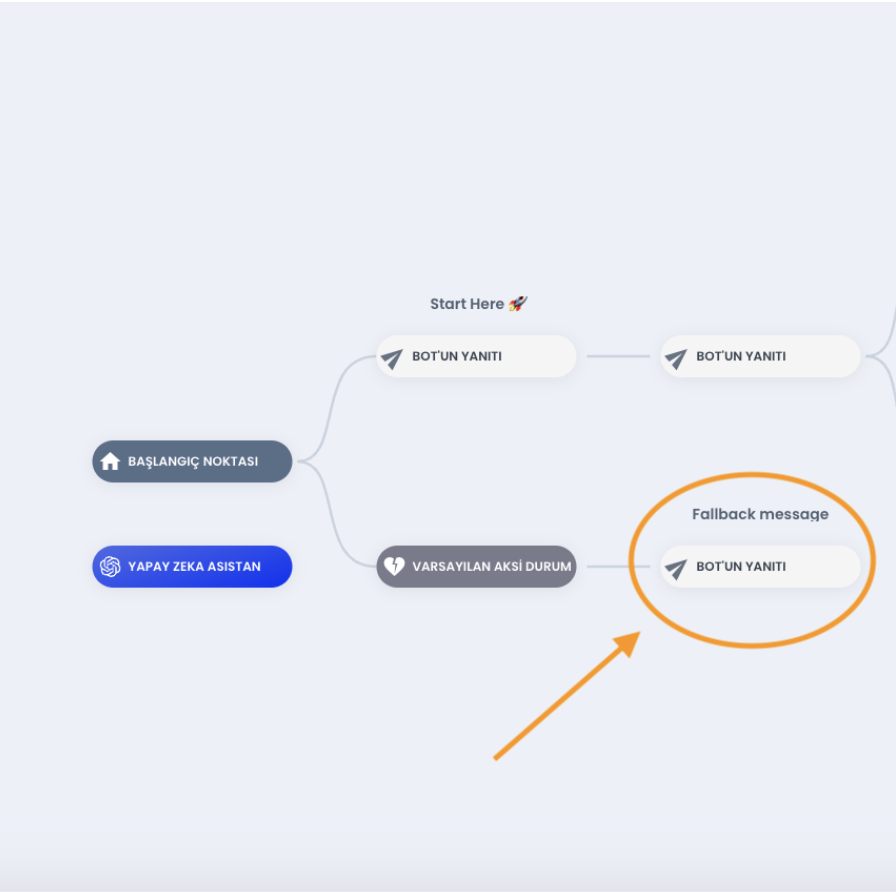 Finally, under the "Start Here" message, you can see the Default fallback. Each story in ChatBot comes with four types of default fallback messages. You can click on it and edit its content as you wish.
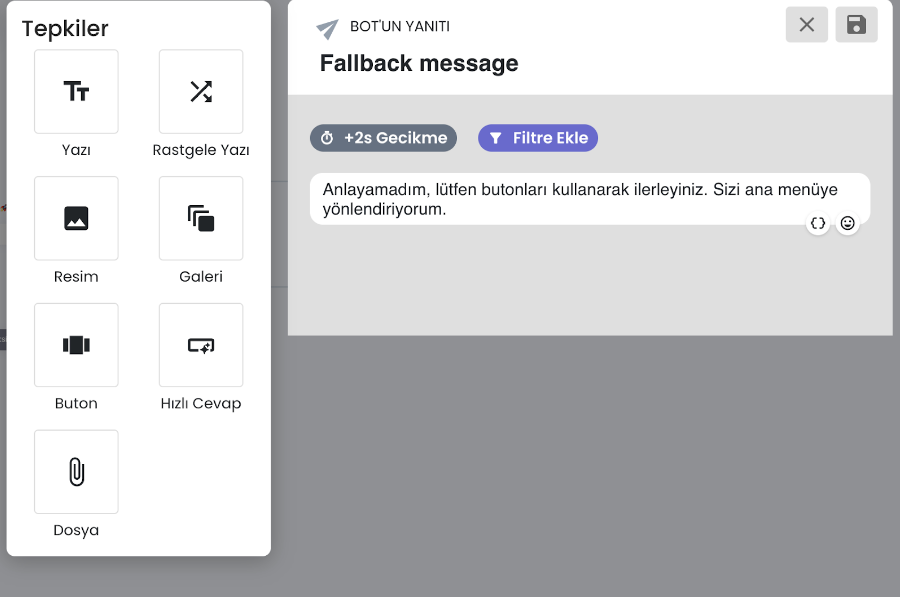
What is Default Fallback? Default Fallback acts as a trigger point and cannot be edited. It is activated when a chatbot cannot find an appropriate response to the user's question. You can add a Bot Response to the default fallback and display a custom fallback message. ChatBot collects all unique interactions responding with fallback interaction and stores them in the Training section. You can add them directly to your chatbot story and train them so that your bot can recognize them next time and provide matching responses.
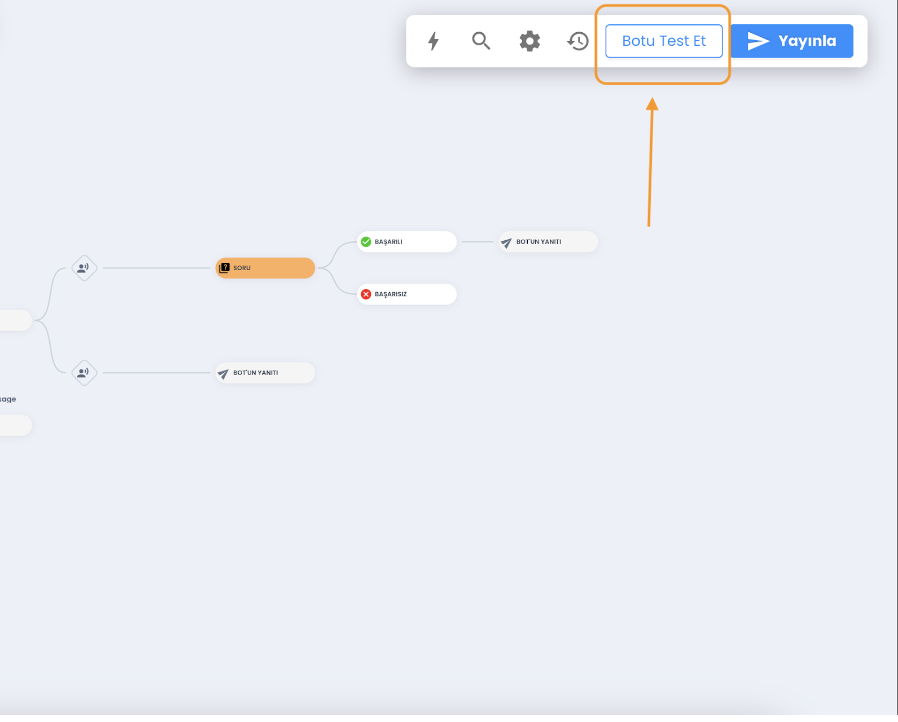 How do you test your Chatbot? Looks like you've created a bot. Congratulations! ChatBot's Visual Builder allows you to test your story from within the app. This allows you to identify and fix errors much faster before showing your chatbot to customers. Click on the Test bot button in the top right menu bar. This will open the Test tool.
How to publish a chatbot to your website?
Now that everything looks good, you're ready to embed your chatbot on your website! Chatbot your story After designing, save the story you have prepared by clicking the "Publish" button at the top right, at this stage The chatbot will ask you, “Would you like to define it as your default story?” shaped. If you press Yes The Chatbot will be automatically integrated on your website and the first Chatbot will greet all your incoming members. ** Moreover: You can go to the Integrations section and see which Chatbot scenario is integrated in which communication channel you want. You can change or remove it. If you want, you can transfer different scenarios to separate channels such as Web, Whatsapp, Instagram. You can provide integrations.**

You can always contact us for all your questions. We wish you pleasant days...